Tuesday, April 28, 2009

"Always Put In List" Option for CKI

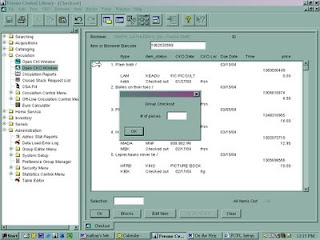
It is helpful to be able to see the title of each item as it is checked in. Sometimes the option that allows this to happen gets "turned off" by another staff person. Here's how to get it back.
  • Select the appropriate CKI mode (i.e. damaged, inhouse, book drop, etc.).
  • On the menu bar go to CKI and click on “Always Put In List”. A checkmark will appear next to the option to let you know it is “turned on”.
  • Make sure the cursor is in the Barcode field. Check in each item in the shipment. All titles should show up on the screen now.
rev. 1/2018

Select Pickup Location Outside FCPL

Some patrons want to place a hold at an FCPL location, but pick it up at a location outside of Fresno County. All ValleyCat access via the Fresno homepage and Fresno Horizon logins will only display FCPL locations. Therefore, you'll need to do one of the following in order to select a non-FCPL location:

  • In ValleyCat: Go to http://www.sjvls.org and from the drop-down on the right side select the ValleyCat catalog for the jurisdiction where the patron wants to pick up the hold. Find the item, place the request and select the pickup location for that jurisdiction. Both patrons and staff can use this method.
  • In Horizon: Go to File - Change Location. Select the location where the patron wants to pick up the hold. Search for the item, place the request and select from the list of pickup locations available for that jurisdiction. When you are finished, don’t forget to change location back to your own branch. This method is only available to staff.
Note: Just in case you're wondering, you cannot simply change the pickup location of an existing request to a non FCPL location via the borrower's record. Why? Because this method circumvents the holds rules in place for each jurisdiction and more importantly, the item will never appear on the pull list of the owning library. So it will look like you’ve placed the hold, but the item will never show up. So use one of the methods listed above instead.

rev. 8/2017

Search This Location Only Option for Borrowers

Here's the scenario: you search for a borrower, but their record doesn't appear. Yet when you try the same exact search on another PC their name comes up right away. What’s going on?

In the Horizon menu under Borrower, there is an option for “Search This Location Only”. Select this option only if you want to search through the list of borrower’s with Location = your branch code in their registration record.

It is easy to accidentally select this option when you really intended to select “Find Borrower” instead. The option will remain selected even when you change users. If you are having trouble finding a borrower, make sure the “Search This Location Only” option does not have a check mark next to it. If it does, just click the option to eliminate the check mark, then try your search again.


rev. 1/2018

Screen Shots

If you are having a hard time describing a Horizon problem to Tech Support, send them a screen shot that illustrates the problem. Here’s how to create a screen shot/print screen:
  1. Bring up the screen you want to copy.
  2. Press ALT-Print Screen* to capture just the active window. Or press CTRL-Print Screen to capture all the open windows. Here’s the difference:
    With ALT-Print Screen With CTRL-Print Screen
  3. Open an Outlook email, Microsoft Word or Notepad.
  4. Press CTRL-V to paste the screen shot into the document. (You can paste the screen shot directly into the email or you can save it as a document in Word or Notepad and then attach the file to the email. We recommend the latter if you have more than 1 or 2 screens to send.)
  5. Repeat steps 1-3 for each screen shot you want to send.
*The Print Screen button is at the top of the keyboard, just to the right of the F-keys

rev. 1/2018