How-to Guide: Checking Out Fast Adds Doc
How-to Guide: Checking in Fast Adds Doc
How to Fast Add
1. In CKO, pull up the borrower’s record.
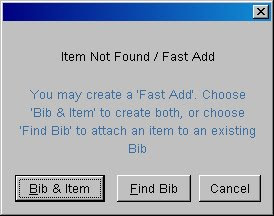
2. Check out the item or select Item – New Item from the menu bar. The Item Not Found screen appears as shown here.

3. Click Find Bib option first.
- Search for the title. If you find it, highlight the record.
- Select Show Detail button.
- On the Menu go to Edit - Send To then Edit: Fast:Add.
- Fill out the remaining information as follows:
- Location: defaults to your location
- Collection code: FA
- Call#: leave blank
- Barcode of item as appropriate
- Call Type: ddc
- Item Type: as appropriate
- Author: LAST, FIRST (IN ALL CAPS)
- ISBN: as appropriate
- Title: IN ALL CAPS
- Location: defaults to your location
- Collection code: FA
- Call#: leave blank
- Barcode of item as appropriate
- Call Type: ddc
- Item Type: as appropriate
When a Fast Add Item Is Returned
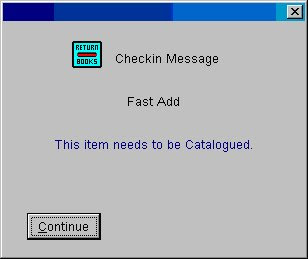
When the item is returned and checked in, the following message appears:
 Click Continue. The item is now checked in with the status of "In Cataloging".
 Then simply fill out the Catalog Correction Form on OZ.
Two Exceptions
There are two types of materials that are exceptions to the above Fast Add instructions:
1. Inter Library Loans: Fast Add records for interlibrary loan materials (itype = fil) are created by Central Circulation. When these materials are returned, these temporary bib and item records are automatically deleted from Horizon since the item will be returned to the lending library.
2. Government Documents: Many government documents are not cataloged. For this type of item, use the collection code of FDXEFDX – Federal or FDXESTX – State as appropriate in the Fast Add window. When these materials are returned, these temporary bib and item records are automatically deleted from Horizon. The item can simply be returned to the collection.
rev. 2/2018
